While working with agile teams - do you constantly fear that your team will soon become a self driven team and will no longer need you?
Is it always your worry that your agile team will stop giving you the importance of a PM?
Fear not.......
Here are 5 simple but highly effective tips that are guaranteed to make you an indispensable PM on your project.
Tip 1: Be the decision maker
As a PM, be the decision maker. Make decisions left, right & centre. Whether it is on ramp-up or roll-offs, release plans or deadlines, you should be the one deciding. Don't even think of consulting your team before making decisions. The more you consult, the more it becomes a collaborative exercise. The more collaborative you become the more redundant you start getting. Remember making decisions on your own, will make the team dependent on you.
Tip 2: Talk to the key stakeholders
Always talk to key stakeholders, but remember to do it alone as much as possible. If you include your team members, they will start owning these discussions and your dependency will start reducing. Don't ever allow that to happen. More & more stakeholder needs to look at you as the crucial person on the team and hence the indispensable one.
Tip 3: Communicate
Communication is essential but not everything needs to be communicated all the time. Remember the more you expose your cards, the more easy it is for the team to take over. Never give all information out at once. Show your importance and keep passing information only at critical times. You can always pretend to be shielding the team from unnecessary noise. The more information you hold, the more you are needed on the team.
Tip 4: Use Tools
Keep stressing the need for using virtual tools than physical walls. Keep pointing out how difficult it is to maintain both physical and virtual walls. Especially if you have distributed teams, more the reason for having a common source of truth & hence a virtual wall. This reduces the visibility that the team normally gets from visual clues. Then it is up to you to highlight all the risks and foreseeing the challenges the team might face. You automatically start becoming more and more important on the team.
Tip 5: Customer is the King
Finally, believe in the age old principle that Customer is the King. Agree to everything that customer says, however unreasonable it is. Never push back the customer. Never check with the team before committing to the customer. Go ahead and commit to deadlines and other plans as asked by the customer. Make the customer Happy.
Once you take all these measures, the team will be under constant pressure. The team will have no time at hand to think beyond day to day tasks. They will not be able to spare time to think about big picture or other corrective measures. Everyone will be dependent only on you. As time passes you will start getting more and more control of the project.
Try these tips on your projects and don't forget to leave comment about your experiences.
PS: Incase the subtlety is not obvious, this is a sarcastic take on being a PM on agile teams. These are anti-patterns to to be aware about. PMs and teams should work towards being self sufficient and one of the success criteria for a PM is to make himself/herself redundant as early as possible.
Wednesday 21 January 2015
Saturday 17 January 2015
Building a Feedback Culture in Teams with Feedback Fridays
I got my first exposure to feedback friday's in one of the first projects I did in ThoughtWorks. I was quite amazed to see how such a simple idea becomes a very effective tool for building a strong feedback culture within the team. From then on, I have used Feedback Friday whenever I am on new teams that are just starting or on teams where feedback is not one of the routines.
Here are few steps that I take to start & monitor feedback friday
Step 1: Day & Time for feedback
Identify a day a time for feedback. As the name suggests, we typically do this on a Friday but there is no hard and fast rule. It is just any convenient day for the team. The time should be such were the entire team is able to spare the time without being bothered for calls, meetings etc. I have found it ideal to devote time immediately after the morning stand-up as everyone is yet to start their work. Trying to carve out time in the middle of the day becomes tough, as people do not like to break flow of work, and by end of the day people are already exhausted.
Step 2: Duration & Place of Feedback
Duration of feedback should not be too long nor should it be too short. Starting with 45 minutes and gradually reducing to 30 minutes works really well as teams start getting into a habit of exchanging feedbacks.
The team needs some place away from desks and laptops to focus only on feedbacks. I have typically booked big meeting rooms for entire team to sit.
Step 3: The Feedback Process
Once the basic logistic are in place, the entire team assembles in the room. Each person picks-up a card and writes feedback for another person on the team. There are NO rules - the person decides for whom the feedback is to be written, for how many people, how detailed or short it needs to be. The only rule is to be present and think & write feedback for your team members.
As a guideline, I call out that feedback can be shared with people whom you have worked recently, people who might have asked for feedback or generally anyone on the team you have observed and would like to share feedback with.
After writing the feedback, the card is handed over to the person for whom the feedback is written. The team members are encouraged to discuss the feedback with each other either immediately or at a later time so there is more communication than just few points on a card.
Step 4: Frequency
Since the main motive of feedback friday is to get people into a habit of sharing feedback. It needs to be done at regular interval till it forms a habit. It can be a collective decision of the team on what frequency they would like to conduct feedback fridays. I have found fortnightly frequency works pretty well. It gives sufficient time for people to observe each other and also the time is not too long that people forget incidences.
It is important to make feedback friday a ritual like stand-up or showcase. Slowly it starts becoming a habit for the team members & feedback culture starts growing.
Step 5: Monitoring
I like to keep track if feedback friday is moving towards the goal the direction it is intended. I keep looking for signs that tell me if feedback culture is getting ingrained.
Step 6: Restart Feedback Friday
Any time you realise that the feedback culture is getting reduced, it is time to restart.
Few other situations when you might want to restart feedback friday is if team size has grown quickly, or a lot of new team members have joined recently.
Other things apart from the above steps that can be taken to ensure feedback culture gets spread is identifying champions among the teams who can drive the activity.
Here are few steps that I take to start & monitor feedback friday
Step 1: Day & Time for feedback
Identify a day a time for feedback. As the name suggests, we typically do this on a Friday but there is no hard and fast rule. It is just any convenient day for the team. The time should be such were the entire team is able to spare the time without being bothered for calls, meetings etc. I have found it ideal to devote time immediately after the morning stand-up as everyone is yet to start their work. Trying to carve out time in the middle of the day becomes tough, as people do not like to break flow of work, and by end of the day people are already exhausted.
Step 2: Duration & Place of Feedback
Duration of feedback should not be too long nor should it be too short. Starting with 45 minutes and gradually reducing to 30 minutes works really well as teams start getting into a habit of exchanging feedbacks.
The team needs some place away from desks and laptops to focus only on feedbacks. I have typically booked big meeting rooms for entire team to sit.
Step 3: The Feedback Process
Once the basic logistic are in place, the entire team assembles in the room. Each person picks-up a card and writes feedback for another person on the team. There are NO rules - the person decides for whom the feedback is to be written, for how many people, how detailed or short it needs to be. The only rule is to be present and think & write feedback for your team members.
As a guideline, I call out that feedback can be shared with people whom you have worked recently, people who might have asked for feedback or generally anyone on the team you have observed and would like to share feedback with.
After writing the feedback, the card is handed over to the person for whom the feedback is written. The team members are encouraged to discuss the feedback with each other either immediately or at a later time so there is more communication than just few points on a card.
Step 4: Frequency
Since the main motive of feedback friday is to get people into a habit of sharing feedback. It needs to be done at regular interval till it forms a habit. It can be a collective decision of the team on what frequency they would like to conduct feedback fridays. I have found fortnightly frequency works pretty well. It gives sufficient time for people to observe each other and also the time is not too long that people forget incidences.
It is important to make feedback friday a ritual like stand-up or showcase. Slowly it starts becoming a habit for the team members & feedback culture starts growing.
Step 5: Monitoring
I like to keep track if feedback friday is moving towards the goal the direction it is intended. I keep looking for signs that tell me if feedback culture is getting ingrained.
- Are people exchanging feedback without waiting for feedback fridays?
- Is the time duration of feedback fridays getting reduced, because more and more people meet offline and exchange feedback?
- Are people getting comfortable with each other to exchange feedback more verbally and using index cards as just means of jotting down points?
It is then time to use feedback friday as a check point to remind people about feedback and not as a dedicated time to exchange feedback.
Any time you realise that the feedback culture is getting reduced, it is time to restart.
Few other situations when you might want to restart feedback friday is if team size has grown quickly, or a lot of new team members have joined recently.
Other things apart from the above steps that can be taken to ensure feedback culture gets spread is identifying champions among the teams who can drive the activity.
20 Things To Do with an Umbrella
Have you ever thought of a using your Umbrella for something other than protecting from rain or sun? That was what a group of 20 people did as a part of an ice breaker before start of a workshop.
During an inception we had few months back, we wanted to run an ice-breaker that would help get a large diverse group comfortable with us & be prepared for a highly intense and creative workshop. We wanted the ice-breaker to be quick, light weight, fun filled & something that gets the creative juices out.

The participants were given one card each and a few sketch pens. The time limit was 10 minutes. The goal was to get as innovative as possible and draw out the idea.
The results were quite creative and participants had fun trying to think of different uses of an umbrella. Once the time was up, each participant was asked to present his idea to the group.
Here are all the innovative uses the group thought of

We ended by asking participants to vote for best idea. The winner was an umbrella that can be used as a solar powered outdoor rotisserie

During an inception we had few months back, we wanted to run an ice-breaker that would help get a large diverse group comfortable with us & be prepared for a highly intense and creative workshop. We wanted the ice-breaker to be quick, light weight, fun filled & something that gets the creative juices out.
We decided to use "What is the most Innovative use of umbrella?"
The participants were given one card each and a few sketch pens. The time limit was 10 minutes. The goal was to get as innovative as possible and draw out the idea.
The results were quite creative and participants had fun trying to think of different uses of an umbrella. Once the time was up, each participant was asked to present his idea to the group.
Here are all the innovative uses the group thought of
We ended by asking participants to vote for best idea. The winner was an umbrella that can be used as a solar powered outdoor rotisserie
Monday 4 August 2014
Release Planning Exercise
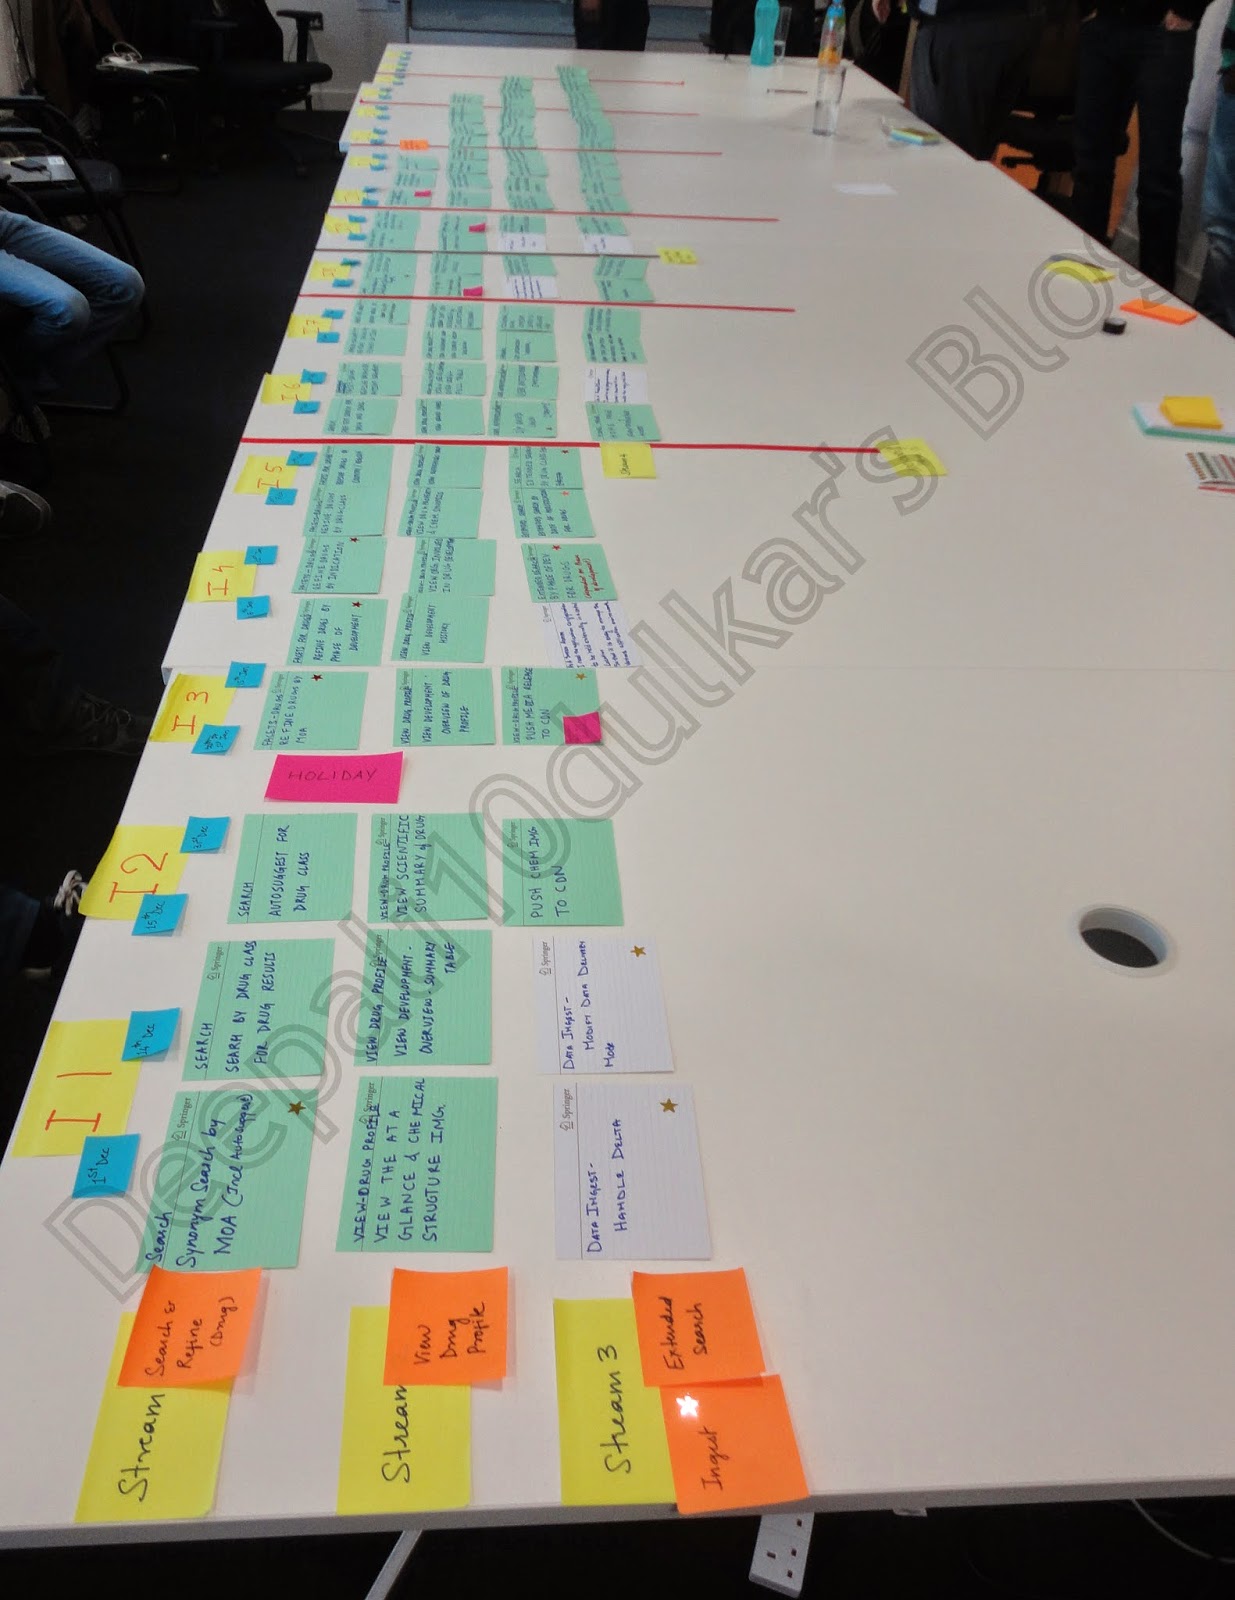
One of the key deliverables of an inception is a Release Plan and release planning exercise is one of the final activities of an inception. Release planning is quite an intense and engaging activity and takes nearly a full day to plan. The below picture is of a completed Release plan after a day long planning session. The release plan has 3 streams to start and the 4th stream starts later down the line. This release plan had releases slotted every 4 weeks with first release in 10 weeks.
For me, this exercise is one of the most important aspects of an inception. Today I am going to talk about how I facilitate a release planning activity. Release planning needs a bit of preparation before the exercise can begin. The first step is to ensure that you have the following things ready before you call the team for planning


How many cards are to be slotted per iteration, per dev pair is something that the development team decides. It is based on complexity of the stories, our understanding and based on our track record of how much we have accomplished in the past. In the above picture you can see that based on our track record and comfort of the devs, we had slotted 2 stories per iteration.

Remember the main aim of the release planing activity is to define smallest possible, business relevant releases. Get your business stake holders to define small goals so that you can take things to market quickly.
Apart from deriving the aims of the release from the inception activities, I have found time boxing a great tool to get stakeholders think in terms of small and frequent releases.
Many times I have asked the customers to prioritize features that they want released first based on the assumption that money gets over by a certain time. Another option is to just draw a regular interval releases - like every 4 weeks or every 6 weeks and ask business to prioritize what gets released in that time frame. You can make this visual by drawing a line with a tape or a ribbon across the table at a gap of every 4 or 6 weeks
The key thing to remember is that business can only decide which stories get done, they cannot decide how many stories get done in the given time frame. This is because as development team, you know the capacity and pace at which your team will perform and business just gets to swap in and out stories and you as development team decide if they can be accomplished in the time frame and if the dependencies are taken care of.
You will soon realize that customers start discussing and start to move stories based on what they want first. Its an iterative process and you keep going through it discussing till all your stories are slotted. Here is a picture of stakeholders moving cards to prioritize requirements.

By the end of the session, you will have most of your stories slotted and releases finalized. Below is a picture of a completed release plan. You can add different color post-its for key dependencies or mile stones. You can color code a feature by different colors to make it a lot more visual. In the below picture, we have 4 streams of work and then some dependencies added in terms of data & UX followed by a 5th & 6th stream which starts later down the line.

You can either slot all your stories or decide to slot only the initial one and then re-plan based on how things progress. The important thing to remember is that this is just a starting point for planning and release planning is a continues process and it keeps evolving as the project progresses. You can read more about how release planning can be used as continuous planning and tracking tool here
In one of the recent inception, we used a i-pad to record the entire release planning activity. Here is a quick 36 sec video that summarizes the whole day. Thank you Michiel for sharing the video :)
For me, this exercise is one of the most important aspects of an inception. Today I am going to talk about how I facilitate a release planning activity. Release planning needs a bit of preparation before the exercise can begin. The first step is to ensure that you have the following things ready before you call the team for planning
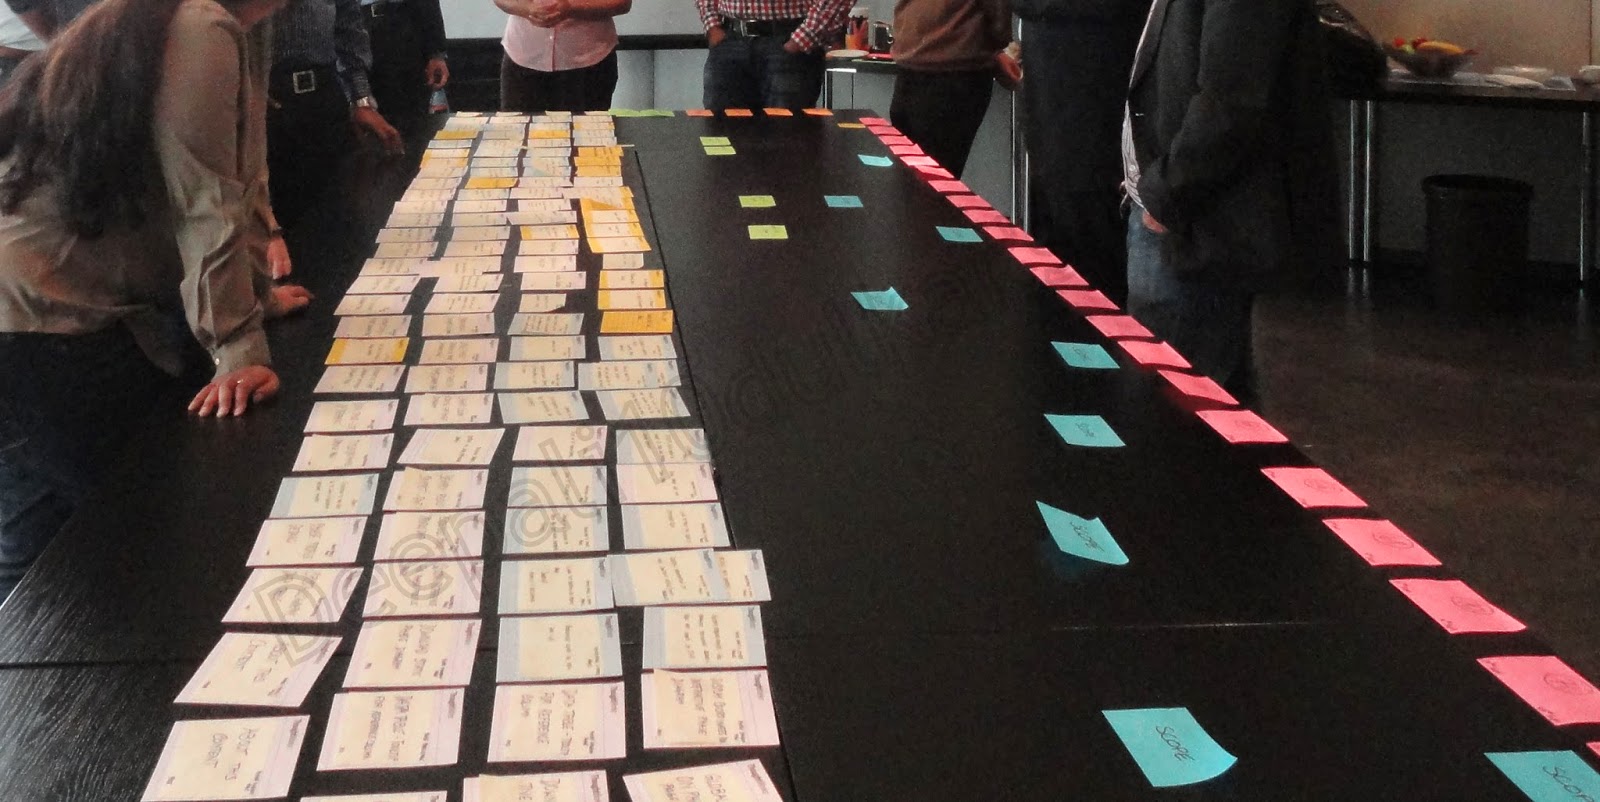
- All the story cards written down on index cards. One story per card. Group them by features (see pic below). You can color code the cards for each feature to have a more visual effect. If you do not have cards you can use paper or post-it notes. Although index cards on table are the most easiest to move around.
- A long table for cards to placed. If long tables are not available, a long running wall with cards stuck using blu-tag (or post-it notes on wall) also works. But moving cards on a wall is a bit troublesome. Or you can just clear the area in the room and use the floor.
- Iteration numbers written down on the top from left to write. The pink post-its in the below picture are iteration numbers
Once the first set of preparations are done, I call the inception team - Devs, BAs, UX , QA (whoever has been part of the inception). I handover all the story cards that are grouped by feature to the team. The next task for this team is -
- To identify feature they would like to play first. Key things to consider while deciding the first feature to play are - the feature with the most technical risk, or a feature that is needed to building the initial technical frame work or the one on which other features have most dependency etc.
- Place the cards in a series and create the first stream of work.
- Once the first set of cards are placed a similar exercise is repeated for the remaining cards. The team tries to determine the next important feature they would like to play and place the cards as the second stream and so on. Any features having dependency are placed in a single stream as they cannot be played in parallel.
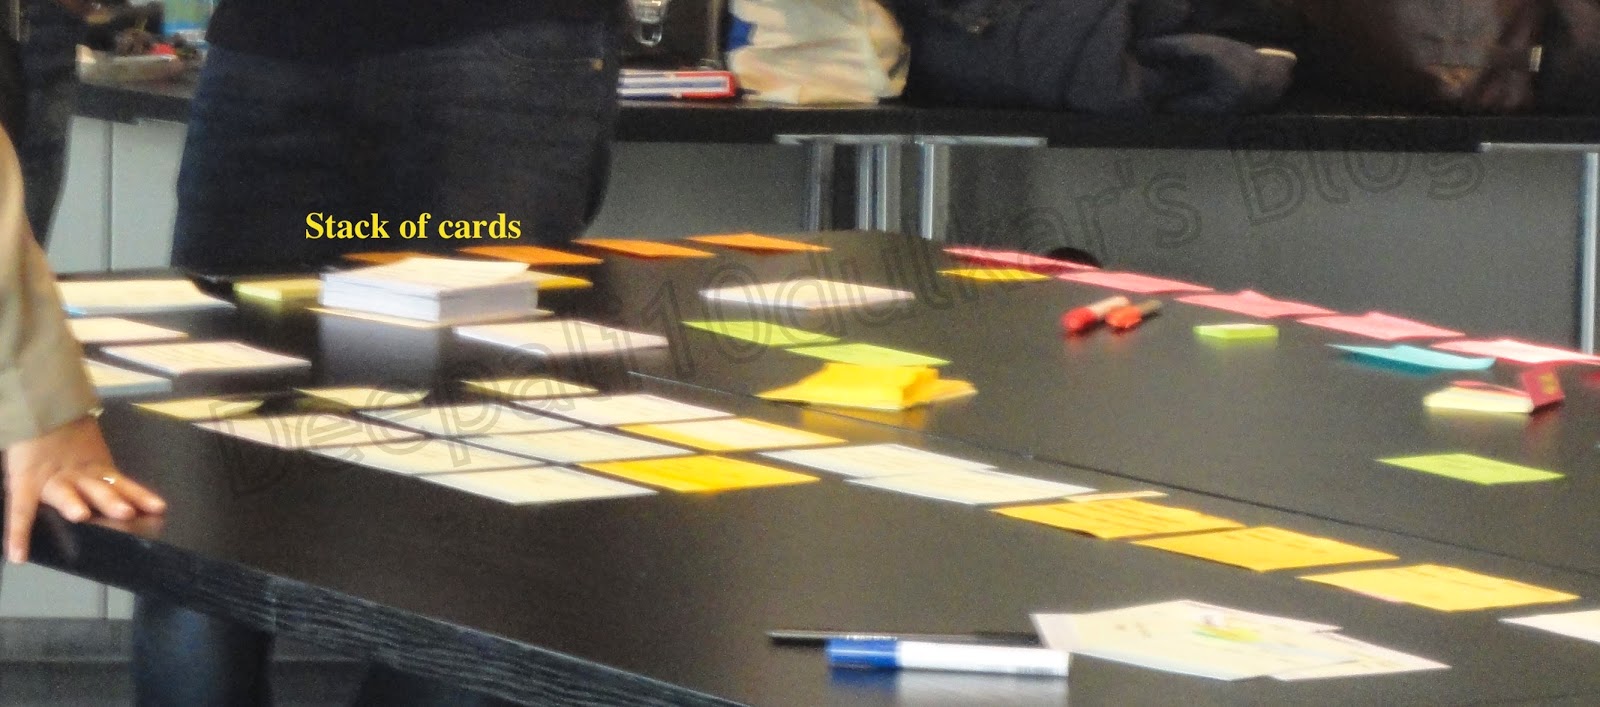
Below is another picture of the inception team busy in discussing how to slot the stories in different streams. If you look closely you can see a stack of cards with each person, these are story cards grouped by features.

I prefer placing these cards at the bottom and leaving some place at the top so stakeholders can move the cards from bottom to the top. Here is a pic of how the cards look when placed at the bottom leaving place at the top for planning with the stakeholders.
Once this step is done, you are ready for action. Now call your stakeholders and walk them through what you have done and why. Talk about what technical dependencies exists and why you thought a particular feature needs to be slotted first.Remember the main aim of the release planing activity is to define smallest possible, business relevant releases. Get your business stake holders to define small goals so that you can take things to market quickly.
Apart from deriving the aims of the release from the inception activities, I have found time boxing a great tool to get stakeholders think in terms of small and frequent releases.
Many times I have asked the customers to prioritize features that they want released first based on the assumption that money gets over by a certain time. Another option is to just draw a regular interval releases - like every 4 weeks or every 6 weeks and ask business to prioritize what gets released in that time frame. You can make this visual by drawing a line with a tape or a ribbon across the table at a gap of every 4 or 6 weeks
The key thing to remember is that business can only decide which stories get done, they cannot decide how many stories get done in the given time frame. This is because as development team, you know the capacity and pace at which your team will perform and business just gets to swap in and out stories and you as development team decide if they can be accomplished in the time frame and if the dependencies are taken care of.
You will soon realize that customers start discussing and start to move stories based on what they want first. Its an iterative process and you keep going through it discussing till all your stories are slotted. Here is a picture of stakeholders moving cards to prioritize requirements.
By the end of the session, you will have most of your stories slotted and releases finalized. Below is a picture of a completed release plan. You can add different color post-its for key dependencies or mile stones. You can color code a feature by different colors to make it a lot more visual. In the below picture, we have 4 streams of work and then some dependencies added in terms of data & UX followed by a 5th & 6th stream which starts later down the line.
You can either slot all your stories or decide to slot only the initial one and then re-plan based on how things progress. The important thing to remember is that this is just a starting point for planning and release planning is a continues process and it keeps evolving as the project progresses. You can read more about how release planning can be used as continuous planning and tracking tool here
In one of the recent inception, we used a i-pad to record the entire release planning activity. Here is a quick 36 sec video that summarizes the whole day. Thank you Michiel for sharing the video :)
Wednesday 23 July 2014
The Agile PM Toolkit Series - Holiday Wall
Our teams need some kind of visual indicator about availability of team members on a given day/week. In order to facilitate this, I have been using a holiday wall in order to bring this visibility on the table.
Below is a picture of holiday wall in 2 of my projects.
.jpg "The Agile PM Toolkit - Holiday Wall") |
| Add caption |
A holiday wall is a very simple matrix with names of team members and dates. Team members indicate planned vacations/time off on this wall by marking a simple cross. We typically try to maintain a visibility of 2 weeks and typically update this on a Mon or Fri.
A visual wall is useful when,
- Signing up for stories - you wouldn't want to start a story by a pair where both are off for next few days or you will ensure that team member who has a planned vacation pairs with some one who is not on vacation at that time.
- Deciding in what to sign-up for an iteration - you will sign-up for less, if the number of people available on the team are lesser
- Setting expectations with stakeholders
- Informing team of your plans in advance
A holiday wall is useful for planned vacation and any adhoc/unplanned leaves are not updated here. Its good to talk about them during standup.
For planned leaves which are beyond the period on the wall, we use a google calendar or put it as comments on the wall.
A point to note is that this is not a substitute for communication, and team members definitely call out about their availability and planned vacations. The wall is just a visual indicator.
Friday 18 July 2014
The Agile Lego Game with a twist of distribution
Two weeks back, we played the Agile lego game in office. The idea was to give a feel of how distributed agile teams works to our new Product Owner and few new team members.

A typical agile lego game consists of teams working for around 3 to 4 iterations and trying to build something using the lego blocks. A product owner is sitting with the team while they build and helps the team in understanding the requirements. He is right there to answer all the queries and the teams get a feel of how interactions help over documentation. The team also tries to builds incrementally and learns the value of being able to build small and change as needed.
We aimed higher, we wanted to give a feel of distributed teams and hence had to add the twist of taking the product owner away from the team and available only on calls :)
We started by creating 3 teams with 5 members each. Each team had 2 product owners and 1 facilitator assigned. We called everyone and explained the rules of the game


In no time our facilitators called "time out" as time for development was over and it was showcase time. Since it would have been difficult to show a lego animal over call, we decided to have the PO visit the teams for showcase. The teams had to showcase the stories that they had developed and get it signed-off from the customer. A few teams managed to get a couple of stories signed off.
We called all the teams together and asked for observations/comments

A typical agile lego game consists of teams working for around 3 to 4 iterations and trying to build something using the lego blocks. A product owner is sitting with the team while they build and helps the team in understanding the requirements. He is right there to answer all the queries and the teams get a feel of how interactions help over documentation. The team also tries to builds incrementally and learns the value of being able to build small and change as needed.
We aimed higher, we wanted to give a feel of distributed teams and hence had to add the twist of taking the product owner away from the team and available only on calls :)
We started by creating 3 teams with 5 members each. Each team had 2 product owners and 1 facilitator assigned. We called everyone and explained the rules of the game
- Planning Meeting for 3 mins (including estimation)
- Each iteration is 7 mins
- Showcase to get stories signed off is 2 mins
- Post showcase everyone will come together for a huddle to discuss the learnings and observation
- The team gets 3 iterations to build an animal
- Since the teams were to get a feel of distribution, we had set-up 6 laptops with a gotomeeting (web conferencing and online meeting tool) which we use regularly on our project. The customer was available online through it.
- A team could make 1 person travel once during the iteration to customer site (if needed)
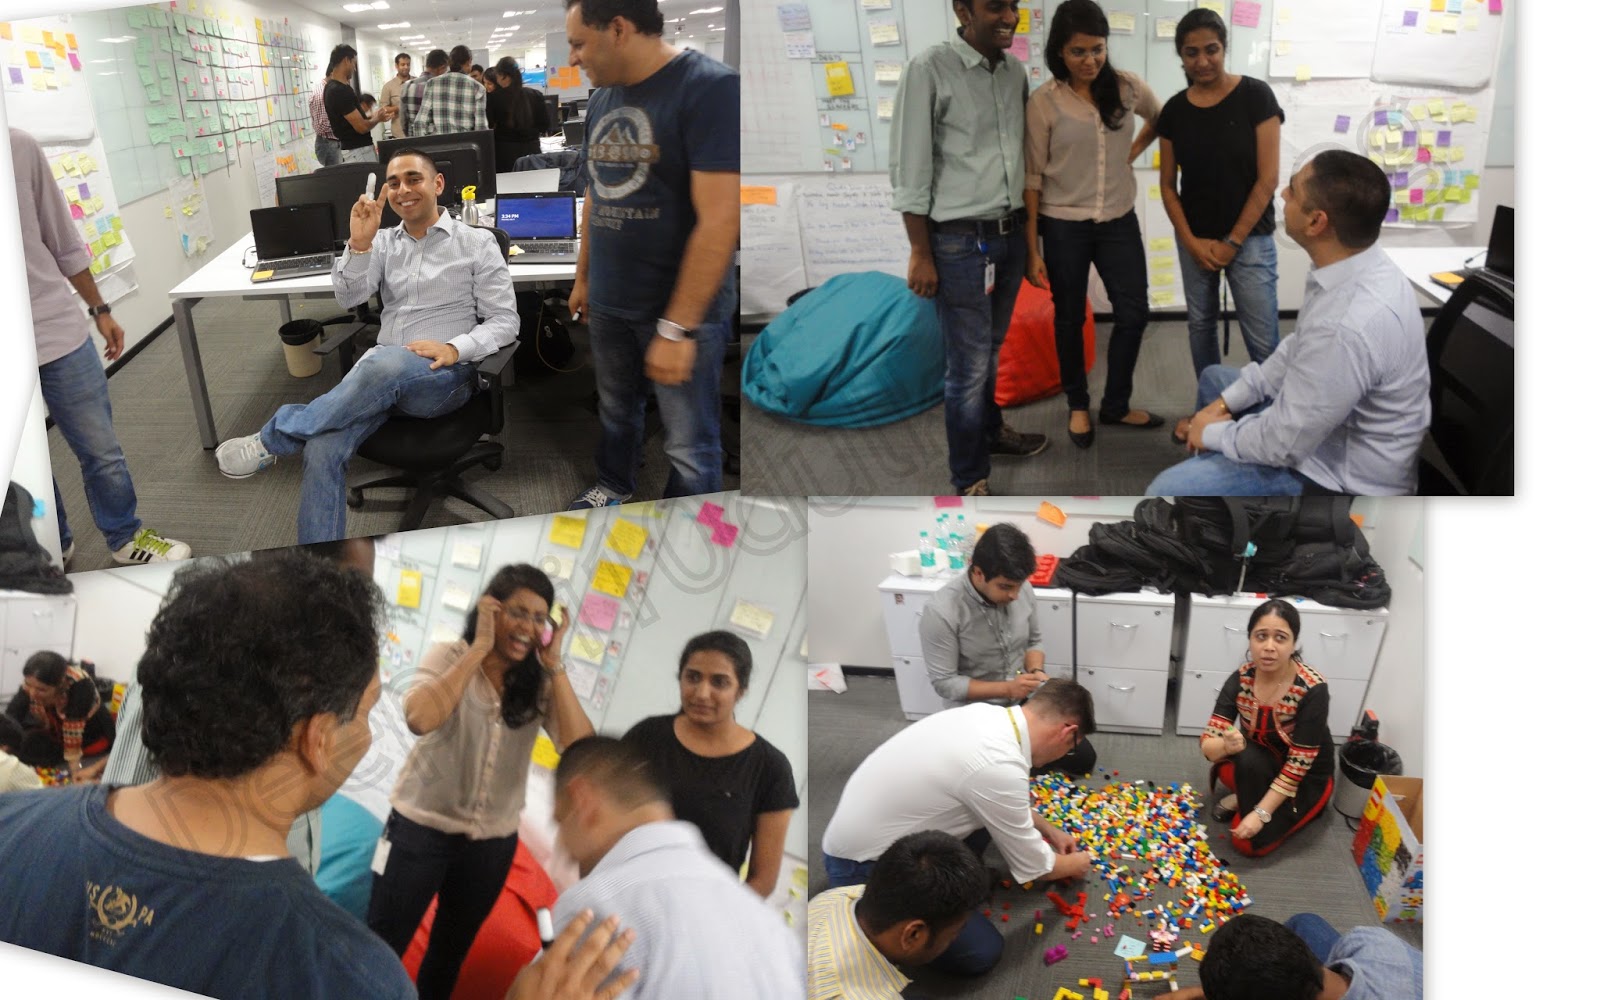
The teams were assigned their Product Owners and facilitators and we started the first iteration. The teams were on one side of the office and the product owners were sitting in meeting rooms. Below is a picture of the teams trying to talk to the PO over a call.
The teams started by looking at stories and trying to talk to the PO to understand more details on each of the stories. Once call was done, the teams got head down building the animal. Here are some pics of teams busy building the animal using the lego blocks
In no time our facilitators called "time out" as time for development was over and it was showcase time. Since it would have been difficult to show a lego animal over call, we decided to have the PO visit the teams for showcase. The teams had to showcase the stories that they had developed and get it signed-off from the customer. A few teams managed to get a couple of stories signed off.
We called all the teams together and asked for observations/comments
- Communicating over a call: The first point was how difficult it was to interact over the call, all the teams & PO understood the challenges of communications that we face on an everyday basis and the importance of using the right tools - online meetings, speakers, camera etc.
- Availability of PO: Some of the PO decided that they were busy in other meetings and were not available for calls ( a very real life scenario) that gave a feel of what the teams face and how important is the availability of a PO for the success of the team.
- Not pushing back on design constraints: Since one story mentioned build the animal in a color, the teams just went ahead and built it in a color of customer choice. No one pushed back on this and later realized how much constraint it adds on the team since lego blocks of that color are limited. This is also a very real life scenario were you might end up making some design decisions that might put big constraints on you if you only think short term.
- Not deciding which stories are priority: Most of the teams just started working on stories immediately, they did not take advantage of planning meeting to discuss the priority of a particular story or the business value it might add. The customer was available and would have informed if they needed a particular story or not.
- No Collaboration between team members: Another challenge that teams faced was many people ended up doing the same activity (like building a fence for the animal). This happened because team members were not collaborating and there was lack of communication between them. This helped in understanding the importance of communication and collaboration between teams. The teams discussed how dining table setting for working helps in communication.
This session was very helpful to the teams as it gave them a quick feedback on how they are doing, and what they need to improve upon. This also emphasized the need of doing regular feedbacks in the team.
The teams then got into their next iteration. This time some of the teams improvised based on the feedback received. This time we decided to have the PO with the teams.
- Some teams planned well and decided on what they will pickup in the iteration. They got their PO to prioritize their stories.
- One team managed to collaborate really well - divided the tasks among themselves
- They got their PO to work very closely with them and managed to build the animal by second iteration.
Below is the picture of the team collaborating effective, working closely with the PO and the animal they build at the end of the second iteration.
It was now time for some twists, based on what we observed
- We decided to swap the PO of 2 teams. We just announced that both these teams now have new PO. It was exactly replicating our real life scenario where we had a new PO.
- We observed that the team which was collaborating well, was heavily dependent on one person interacting with the PO, we decided that he is out sick and took him out of the team
- We also decided that although one team had managed to build the animal in the 2nd iteration, due to business requirements we wanted lots of changes in it.
The idea was to give the teams a feel of real life situations and see how teams adapt to change of key stakeholders and change in business needs. We also wanted the teams to experience what happens if there is a single point of failure.
At the end of 3 iterations the teams had some real fun playing the game & building the animal along with the an effective & long lasting learning experience.

Wednesday 9 July 2014
The Agile PM Toolkit Series - Capacity Planning and Tracking Tool
Today I would like to share an excel sheet that I use for creating my capacity planning, Burn-up and Scope tracking.
My colleague Angela Ferguson had shared her planning sheet with me (thanks Ange). Over the years I tweaked it for my needs and added my specific flavors to it. The attached excel sheet is my version of capacity planning and tracking.
At some point while using this sheet, I needed scope tracking sheet and hence added it. The burn-ups from tools were not effective as I wanted to add scope lines and other things so also added a burn-up sheet. In some projects I needed finger charts and also have another version with finger charts as well. Drop a comment if you need the one with finger charts.
I use this excel to determine the capacity of the team and hence the velocity. I also use this sheet for regular tracking of leaves and determining the utilization so I can plan better for future.
Instructions for using the excel sheet are mentioned in the "Read Me" sheet.
Please download it as "Excel" and not as a google doc. The formulae and formatting will ONLY work on excel. Feel free to change it as needed and share it with others. Please drop your comments on how you find this tool. Let me know if it was easy or tough to use and understand the instructions.
Capacity Plan and Tracking
Wednesday 2 July 2014
The Agile PM Toolkit Series - River of Life/Time Line
Another tool in my PM Toolkit is the "River of Life". A fantastic tool that can be used for varied purposes. I have used it for retros, personal journeys, milestone celebrations, or even presentations.
Today, I would like to talk about the "river of life" as a tool in projects. Below is a picture from 2 different projects where I have facilitated/attended the "river of life". In one project (the picture with orange and pink post-its) I have used it as a mechanism to identify things that have worked for us(orange post-its) and things that have challenged/not worked for us (pink post-its). In the second project we used to to identify things that we "learned", "liked", "lacked" and "longed".

Below I have tried to capture step by step flow of all the activities that I do when I facilitate a river of life exercise. The exercise listed below was done as a part of milestone check and the team wanted to reflect on past and take a stock of the current situation.
Step 1
To run a river of life exercise, first determine a timeline (1 month, 3 months, 6 months) and determine what is it you want to achieve - a retro, a celebration, just talk etc.

Step 2
Get the team to start identify key events that have happened during this time. The key events can be anything that is significant to the team - a milestone reached, a team outing, some one joining the team etc. The idea of identifying key events is for the team to recollect what happened during that time. One event per post-it. Get the team to put it on the time line
Now do a walk through of the events, this helps in the team talking about incidences and recollecting them. Some times just this activity is sufficient and you may want to end the river of life here itself. I have used this when I just want the team to talk about things that have not been spoken about, things that I want the team to "get out of the system" and move on. At times I have also stopped here when I just wanted the team to reflect on things accomplished and celebrate :)
But if you want to do more then go to Step 4. Based on what the aim of my session is I ask the team to do the next set of activity. As an example, I will talk about how I have used it to discuss things that have worked and things that are challenging.
Step 4
Once the team has spoken about the timeline, I distribute the post-its again and ask the team to now think about things that have worked for them, or made them happy or made their life simpler, anything that has benefited the team. All the things have to be in relation to the timeline. The post-its will be added above the timeline. The higher the happiness factor the higher the post-it is put on the time line.
Step 5
Similarly we repeat the exercise for all the things that have challenged, made you go slow, made you sad/unhappy or disturbed. Again the post-its are added below the timeline. The unhappier the event the lower it is placed.
Step 6
Once all the events are added, walk through the events and talk about them. Some times the team discusses action items for avoiding the mistakes, actions to continue the good things. Don't mandate the action items - let them flow on its own and if they don't, its OK. The aim is to talk about it.

Finally, this is not an every day activity. Use it once in a while after some significant events have happened. It can also be used as a end of project retro.
Today, I would like to talk about the "river of life" as a tool in projects. Below is a picture from 2 different projects where I have facilitated/attended the "river of life". In one project (the picture with orange and pink post-its) I have used it as a mechanism to identify things that have worked for us(orange post-its) and things that have challenged/not worked for us (pink post-its). In the second project we used to to identify things that we "learned", "liked", "lacked" and "longed".
Below I have tried to capture step by step flow of all the activities that I do when I facilitate a river of life exercise. The exercise listed below was done as a part of milestone check and the team wanted to reflect on past and take a stock of the current situation.
Step 1
To run a river of life exercise, first determine a timeline (1 month, 3 months, 6 months) and determine what is it you want to achieve - a retro, a celebration, just talk etc.
Step 2
Get the team to start identify key events that have happened during this time. The key events can be anything that is significant to the team - a milestone reached, a team outing, some one joining the team etc. The idea of identifying key events is for the team to recollect what happened during that time. One event per post-it. Get the team to put it on the time line
Step 3
Now do a walk through of the events, this helps in the team talking about incidences and recollecting them. Some times just this activity is sufficient and you may want to end the river of life here itself. I have used this when I just want the team to talk about things that have not been spoken about, things that I want the team to "get out of the system" and move on. At times I have also stopped here when I just wanted the team to reflect on things accomplished and celebrate :)
But if you want to do more then go to Step 4. Based on what the aim of my session is I ask the team to do the next set of activity. As an example, I will talk about how I have used it to discuss things that have worked and things that are challenging.
Once the team has spoken about the timeline, I distribute the post-its again and ask the team to now think about things that have worked for them, or made them happy or made their life simpler, anything that has benefited the team. All the things have to be in relation to the timeline. The post-its will be added above the timeline. The higher the happiness factor the higher the post-it is put on the time line.
Step 5
Similarly we repeat the exercise for all the things that have challenged, made you go slow, made you sad/unhappy or disturbed. Again the post-its are added below the timeline. The unhappier the event the lower it is placed.
Step 6
Once all the events are added, walk through the events and talk about them. Some times the team discusses action items for avoiding the mistakes, actions to continue the good things. Don't mandate the action items - let them flow on its own and if they don't, its OK. The aim is to talk about it.
Tuesday 1 July 2014
The Agile PM Toolkit series - The Release Planning Wall
I have started with the The Agile PM Toolkit series with the thought of writing about tools and techniques that I have found quite helpful while PMing Projects. I have been using most of these tools quite regularly. Some I have learned them from my fellow ThoughtWorkers and adopted in my projects while some I have derived on my own. The idea is to share these and spread the knowledge. Please provide your valuable feedback and comments. Feel free to share this with others.
The first in the series is the "Release Planning Wall".

The Release Planning wall is an outcome of the Release Planning exercise done during inception. It helps me in planning and tracking the project on a day to day basis. With a release planning wall, I am able to identify
- Number of Parallel streams planned
- Dependency of stories in a stream and across the streams (add small post-its of different color to highlight dependency)
- Priority of features/stories planned
- How a feature is being build (each story card for a feature can be of different color)
- How are next set of Iterations planned
- Most importantly, the Big picture view. How everything fits in together
The release planning wall is a typical grid of story cards arranged in rows and columns. The columns represents iterations and the rows represents parallel streams of work. Most often one stream is equivalent to work accomplished by a dev pair in the project. Each card represents a story. The cards can be color coded to represent specific features.
.jpg)
Whenever possible, I try to setup this wall just on the left of the current iteration wall. This way there is a visual indication of work that needs to be done on your left, followed by work that is currently in play on your right.

As iterations are completed the stories on the wall move from the Release wall (future iterations) to the Current iteration wall. The Release wall is a continues planning wall and work will flow as project progresses. The wall keeps on evolving as team starts delivering. It is flexible enough to change as per business needs. The focus is to ensure that the immediate set of iterations are planned really well. The future can be planned on rough assumptions and can be hazy. Things keep getting clearer as you move ahead.
The wall can be made a lot more visual by color coding features, adding small post-its, adding a grid etc. The above pictures has pink post-its to indicate UX dependencies and yellow post-its for data dependencies. You can get as fancy as you want.
Planning and updating the wall is a team activity and you need inputs from from your team to identify dependencies and plan the work. The BAs, Devs, UX & PM can all work together to prepare the wall. The Product Owner can define the business priorities for the planning.
This wall is a physical wall and can be replicated in tools like Jira and Mingle for remote access or distributed teams. I understand that it is duplication of work to have the wall at two places. But the benefits of having a visual indicator in front of the team is so high that I do not mind the effort of duplication and keeping the electronic wall in sync.
Update: I have written about how to facilitate a release planning session during inception here. This is the first activity post which a release plan can be used as a tracking tool.
Tuesday 24 June 2014
I will learn to drive
This is my 3rd attempt at writing a blog.
My attempt at blogging seems to be taking the same path as my attempt to drive a car - a total disaster!!
Not being able to drive is not such a big thing. Especially in India where public transport is easily available. My need of commute is met. I can travel by a taxi, a bus or an auto. But being able to drive gives a kind of freedom. Freedom to go around at my own free will.
Its probably similar with blogging. Since I interact a lot with people, I have avenues to express myself. But there is an urge to blog. Its based on the hope that blogging will probably give me the freedom to express my thoughts at my own free will.
Let's see how this all turns out to be.
I have a lot of patience and persistence. I don't give up easily. I will try again.. and again.. and again..
I am sure one day I will also learn to drive
Let's see how this all turns out to be.
I have a lot of patience and persistence. I don't give up easily. I will try again.. and again.. and again..
I am sure one day I will also learn to drive
Subscribe to:
Posts (Atom)